


How to use Agilent 34970A, the instrument self-test


The Agilent 34970A is a high-performance, low-cost data acquisition and switching mainframe that is well suited for data logging, data acquisition, and general switching and control applications. It is a half-rack-wide mainframe with an internal 61/2-bit (22-bit) digital voltmeter, and three slots on the back to accept a combination of switching and control modules.
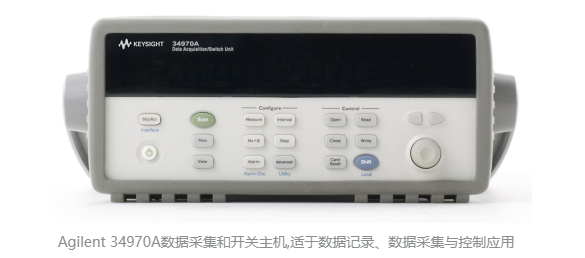
Through the first paragraph to understand the Agilent 34970A parameters, how also need other content of the product, you can go to the official website to download the manual, or directly in the Megatron website, product center for product details information (software, options, etc.).
Model:34970A
Name: Data acquisition / data logger switch unit
Brand:Agilent
Category: General electronic test > Data acquisition system
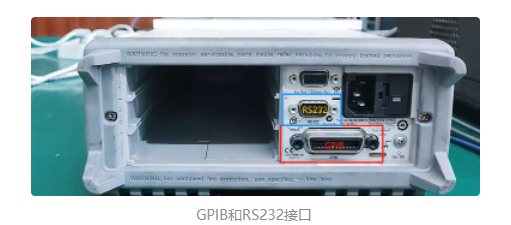
How does the Agilent 34970A data acquisition instrument self-test at power-on? Since the two interfaces GPIB and RS232 are rarely used, we will often forget or even not use the function of power-on self-test. In the picture below, we can see the interface behind the host computer.
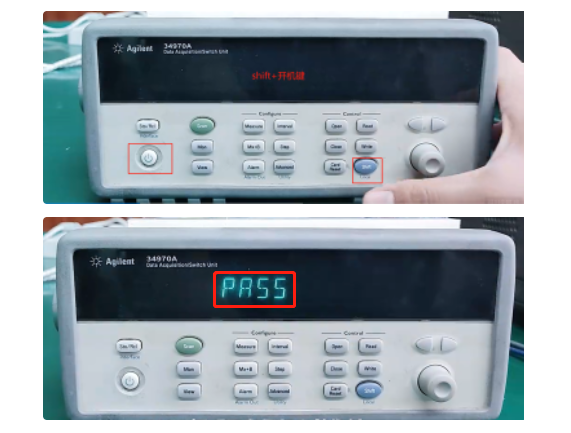
First of all, we boot up press: shift + boot power button, hear the instrument "beep" sound, you can see the instrument shows PASS, that has passed the boot self-test.
Agilent 34970A communication interface settings and testing? (GPIB, RS232 method is the same)
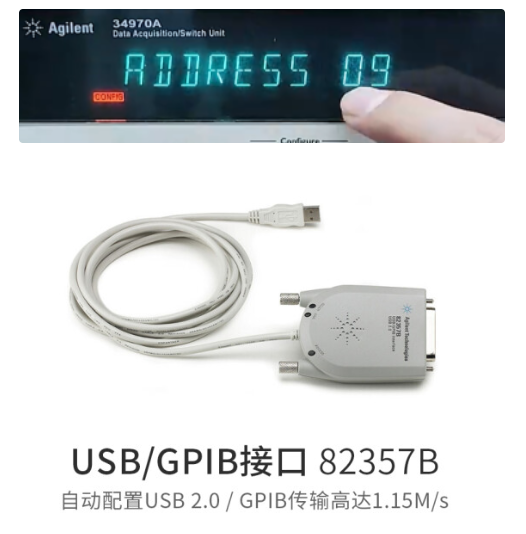
Press shift+interface on the instrument and rotate the right button to select the interface mode (GPIB, RS232) you want to interface with.
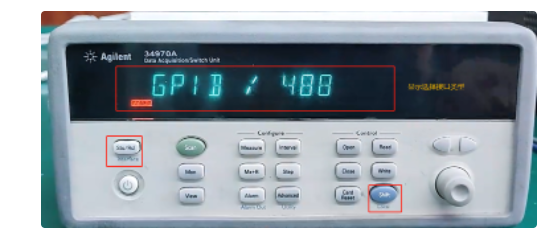
Press interface again after confirmation and see the rear display 09, this is the channel address, ignore it. Connect the GPIB interface of 34970A through 82357B card and open the I/O software.
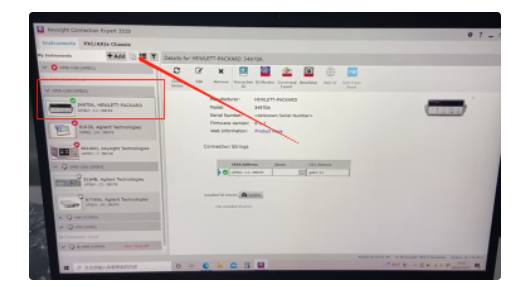
Within the I/O software, find the Search button and click on it. The 34970A can be seen searching out through the left sidebar GPIB-USB.
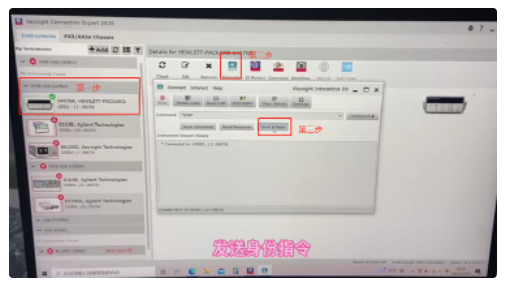
Click on the 34970A device, find the interactive, pop-up dialog box, select send&read. 34970A communication settings are complete.
The Agilent 34970A is a high-performance, low-cost data acquisition and switching mainframe that is well suited for data logging, data acquisition, and general switching and control applications. It is a half-rack-wide mainframe with an internal 61/2-bit (22-bit) digital voltmeter, and three slots on the back to accept a combination of switching and control modules.
Through the first paragraph to understand the Agilent 34970A parameters, how also need other content of the product, you can go to the official website to download the manual, or directly in the Megatron website, product center for product details information (software, options, etc.).
Model:34970A
Name: Data acquisition / data logger switch unit
Brand:Agilent
Category: General electronic test > Data acquisition system
How does the Agilent 34970A data acquisition instrument self-test at power-on? Since the two interfaces GPIB and RS232 are rarely used, we will often forget or even not use the function of power-on self-test. In the picture below, we can see the interface behind the host computer.
First of all, we boot up press: shift + boot power button, hear the instrument "beep" sound, you can see the instrument shows PASS, that has passed the boot self-test.
Agilent 34970A communication interface settings and testing? (GPIB, RS232 method is the same)
Press shift+interface on the instrument and rotate the right button to select the interface mode (GPIB, RS232) you want to interface with.
Press interface again after confirmation and see the rear display 09, this is the channel address, ignore it. Connect the GPIB interface of 34970A through 82357B card and open the I/O software.
Within the I/O software, find the Search button and click on it. The 34970A can be seen searching out through the left sidebar GPIB-USB.
Click on the 34970A device, find the interactive, pop-up dialog box, select send&read. 34970A communication settings are complete.