


KEYSIGHT N1092 Series, DCA-M Series Sampling Oscilloscopes Connection and Self-Test?


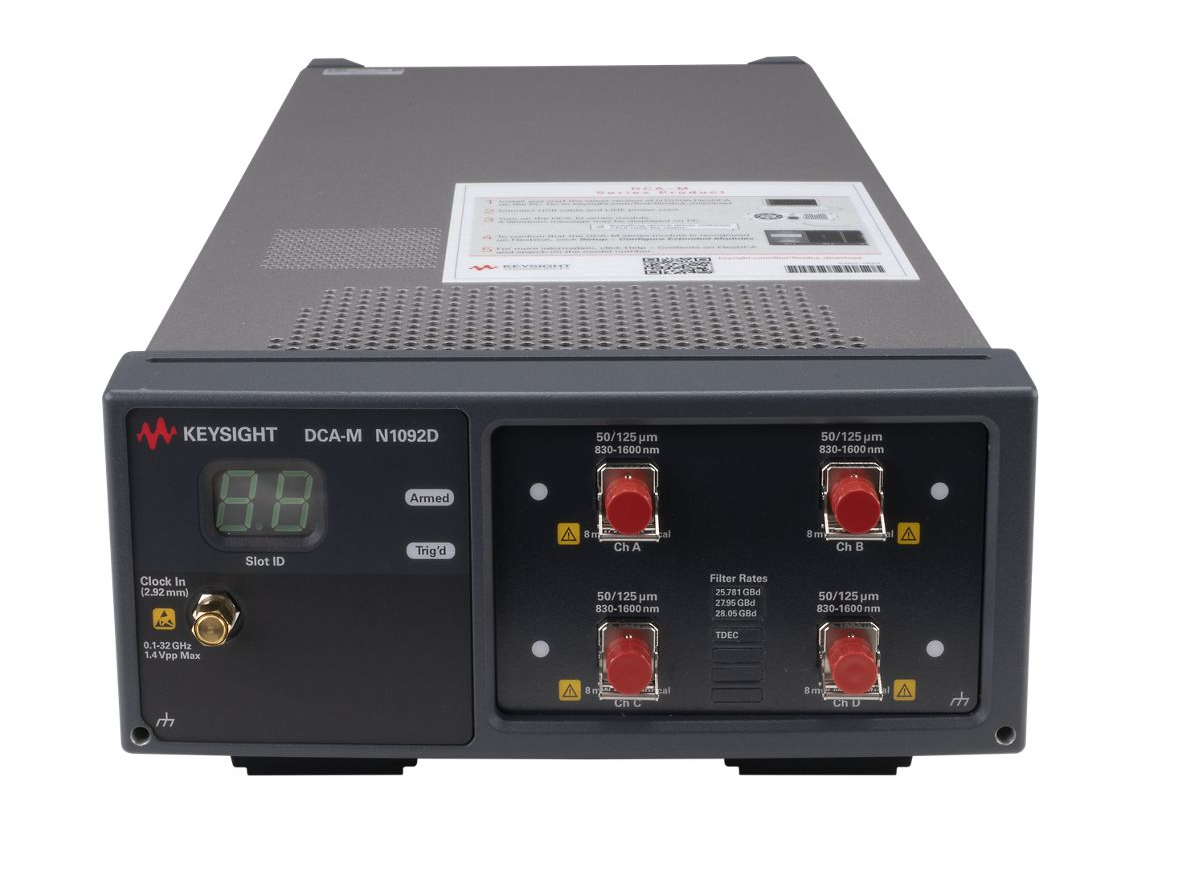
KEYSIGHT N1092 series Sampling Oscilloscopes, although omitting the screen and operating system, can be equipped with different numbers of optical and electrical ports depending on the model to meet various testing needs. The specific model introduced here is the N1092D, which has four optical ports and is capable of performing a wide range of tests.
Test Steps in Detail
Next, we will detail how to connect and self-test this oscilloscope.
1. Panel Layout and Interface Functions
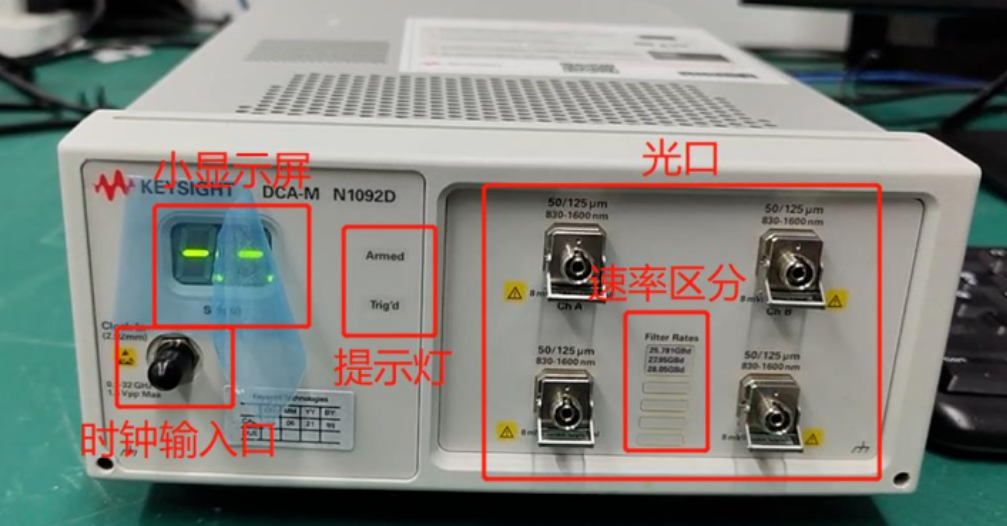
Open the panel of the oscilloscope, you will see four optical ports on the right side for accessing the test equipment; between the optical ports, there is an interface to distinguish the rate of other filters; on the left side is the clock input port; above the small display shows the current sampling oscilloscope in the software slot information; on the right side of the small screen, there are two indicators, which indicate the triggering status and warning signals.
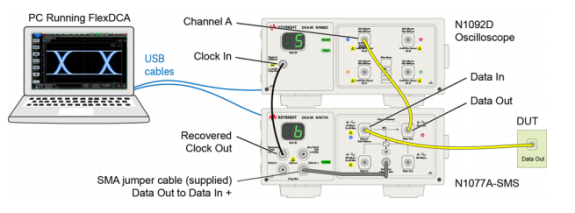
Since this oscilloscope does not have its own firmware and operating system, it needs to be connected to a PC or 86100 series oscilloscope mainframe via a USB cable in order to be used.
2. Software Operation and Module Management
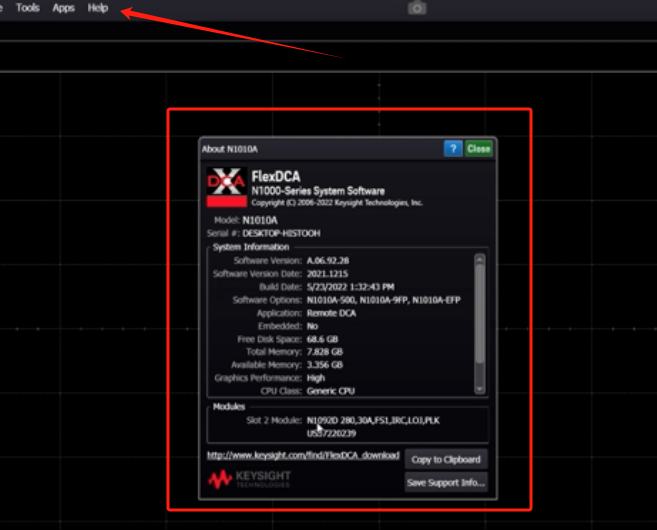
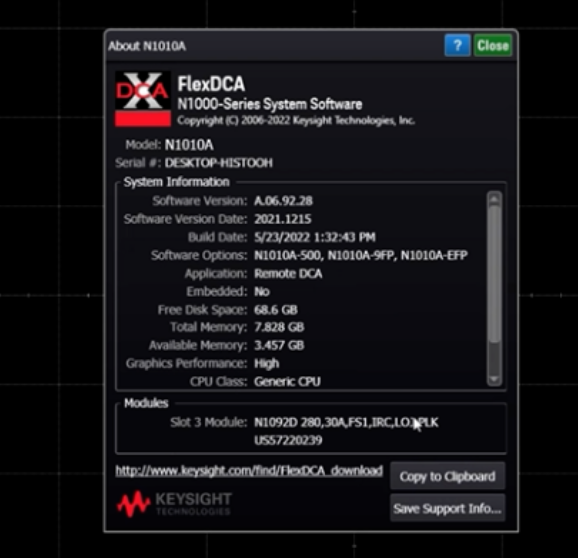
When you open the application of DCA-M Oscilloscope on PC, a pop-up window will appear at the bottom left corner of the program interface to notify you if there are new modules added. You can also use the “help” button at the top of the interface to view module information, such as the options and serial number of the N1092D introduced here.
Click on the slot just mentioned at the bottom left of the interface and you can see that the N1092D is located on the second slot. This software supports up to 8 slots, meaning that up to 8 slots can be controlled at the same time.
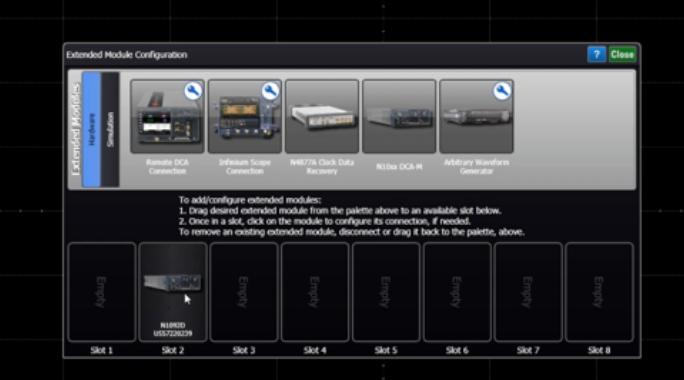
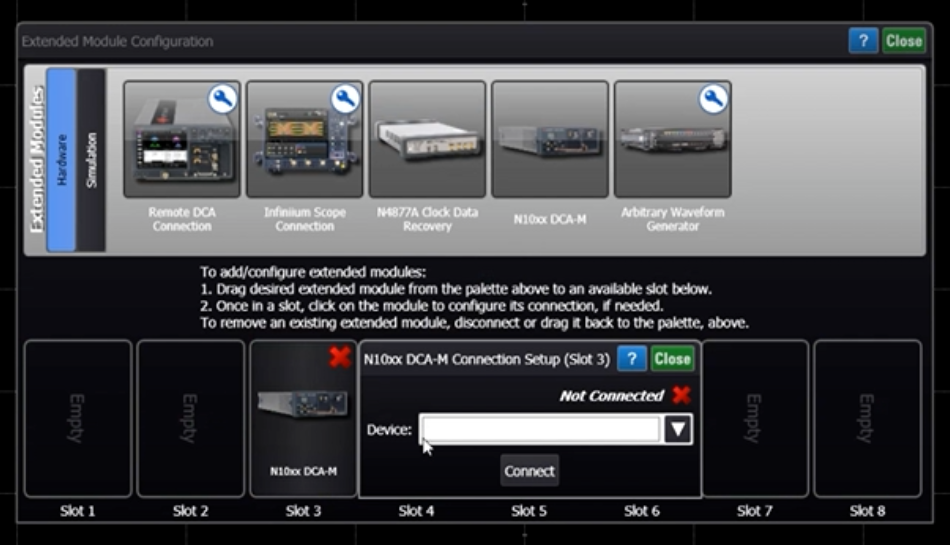
If you need to switch slots, you can disconnect the current slot (2) and then pull it back to another slot (3), at which time the slot number in the display window on the instrument panel will change accordingly.
In this interface, you can select the main test item, including eye chart, TDR, and jitter and many other test items.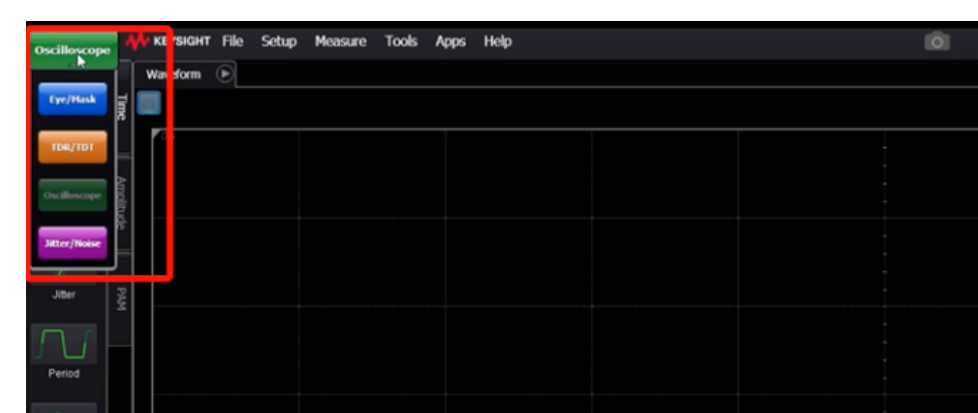
3. Hardware self-test and troubleshooting
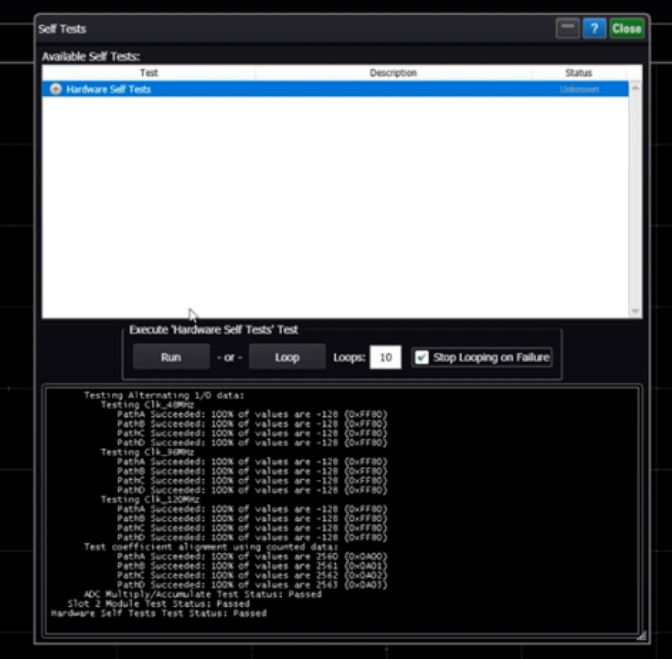
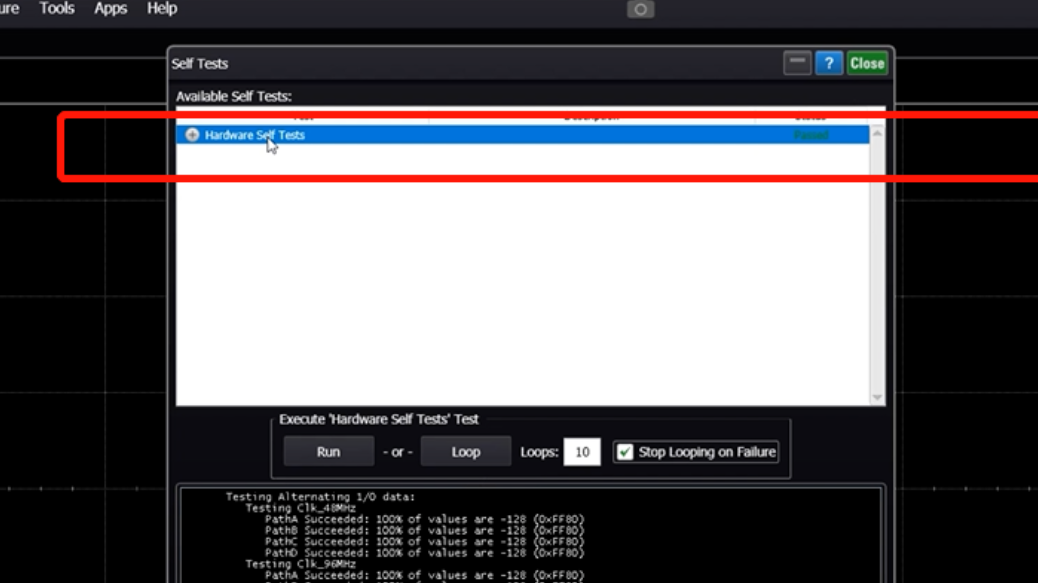
To make sure the instrument works properly, we can perform hardware self-test under Tools menu. Select the current module and click Run, the system will prompt the indicator on the front panel to change color to complete different test items.

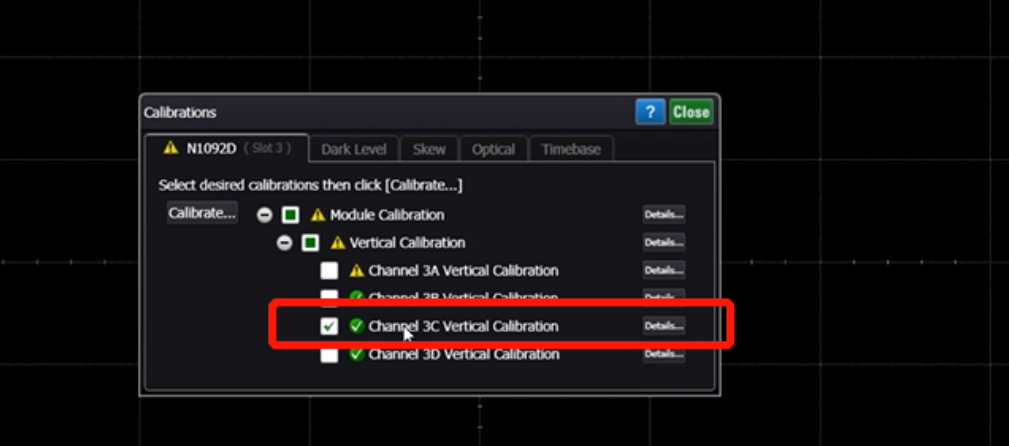
If any problems are found during the self-test, we can perform a self-calibration. Under the Tools menu, select calibrations and if there is no light source, you can choose to perform the first two calibrations. For example, the third channel in the module can be selected for calibration.
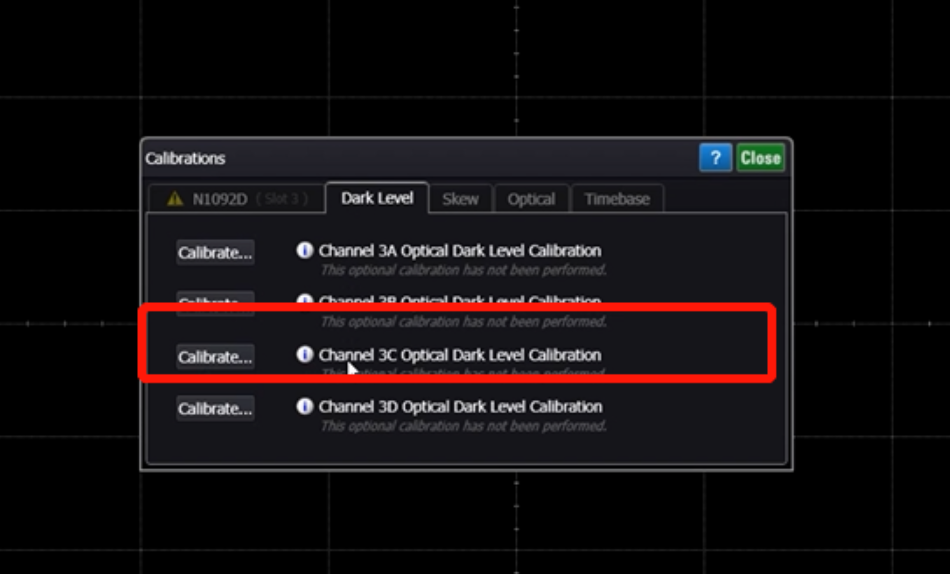
After completing the calibration, go to the Dark Level item to calibrate the dark light amplitude. If you encounter a self-calibration failure, you can save the current information and proceed to the next step of testing to find out the problem.
Click the Help button and select Check for Updates to save the instrument information and self-calibration failures.
KEYSIGHT N1092 series Sampling Oscilloscopes, although omitting the screen and operating system, can be equipped with different numbers of optical and electrical ports depending on the model to meet various testing needs. The specific model introduced here is the N1092D, which has four optical ports and is capable of performing a wide range of tests.
Test Steps in Detail
Next, we will detail how to connect and self-test this oscilloscope.
1. Panel Layout and Interface Functions
Open the panel of the oscilloscope, you will see four optical ports on the right side for accessing the test equipment; between the optical ports, there is an interface to distinguish the rate of other filters; on the left side is the clock input port; above the small display shows the current sampling oscilloscope in the software slot information; on the right side of the small screen, there are two indicators, which indicate the triggering status and warning signals.
Since this oscilloscope does not have its own firmware and operating system, it needs to be connected to a PC or 86100 series oscilloscope mainframe via a USB cable in order to be used.
2. Software Operation and Module Management
When you open the application of DCA-M Oscilloscope on PC, a pop-up window will appear at the bottom left corner of the program interface to notify you if there are new modules added. You can also use the “help” button at the top of the interface to view module information, such as the options and serial number of the N1092D introduced here.
Click on the slot just mentioned at the bottom left of the interface and you can see that the N1092D is located on the second slot. This software supports up to 8 slots, meaning that up to 8 slots can be controlled at the same time.
If you need to switch slots, you can disconnect the current slot (2) and then pull it back to another slot (3), at which time the slot number in the display window on the instrument panel will change accordingly.
In this interface, you can select the main test item, including eye chart, TDR, and jitter and many other test items.
3. Hardware self-test and troubleshooting
To make sure the instrument works properly, we can perform hardware self-test under Tools menu. Select the current module and click Run, the system will prompt the indicator on the front panel to change color to complete different test items.
If any problems are found during the self-test, we can perform a self-calibration. Under the Tools menu, select calibrations and if there is no light source, you can choose to perform the first two calibrations. For example, the third channel in the module can be selected for calibration.
After completing the calibration, go to the Dark Level item to calibrate the dark light amplitude. If you encounter a self-calibration failure, you can save the current information and proceed to the next step of testing to find out the problem.
Click the Help button and select Check for Updates to save the instrument information and self-calibration failures.